Updating Contact Information in the Campus Directory
Campus Directory contact information is derived from the Work Contact Information section of your Personal Information profile in Workday. To update your campus address and/or phone number in the Campus Directory, employees must log into Workday and follow the instructions below. Alternately, you may find a PDF version of these instructions here. Please note that changes to your legal name in Workday and the directory require specific government-approved documents.
How to update Work Contact information in Workday to update the Campus Directory:
- Log into Workday.
- Click on the “Personal Information” worklet, (located on the homepage or by clicking “MENU”).
- Click on “Contact Information,” then the “Edit” button.
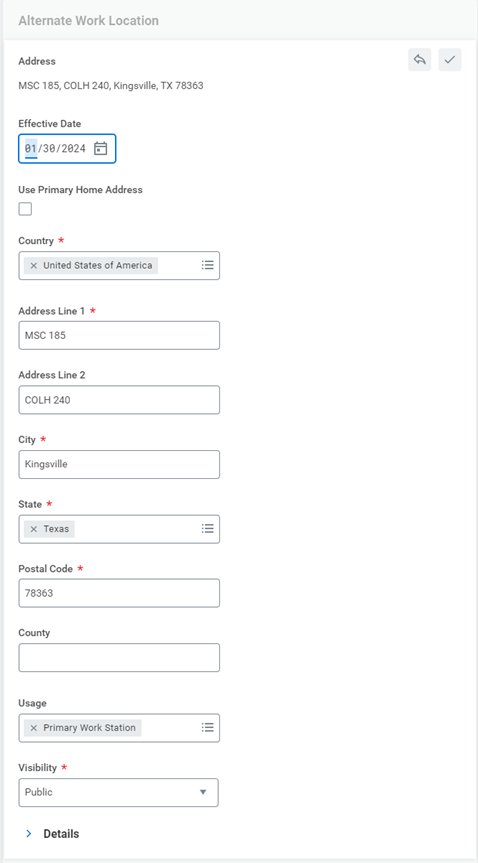
- Scroll down to “Work Contact Information,” and click the pencil icon on the “Alternative Work Location” section.
- In the “Address Line 1” field, type “MSC,” one (1) space, and your Mail Stop Code number.
- In the “Address Line 2” field, type your building code, one (1) space, and your room number.
- See a list of Directory Building Codes on the Facilities website.
- Continue filling out fields for City, State, and Postal Code.
- In the “Usage” field, check the box next to “Primary Work Station.”
- In the “Visibility” filed, select the “Public” option.
- Once all fields contain updated contact information, click on the “checkmark” icon
(See a screenshot of these fields below.)
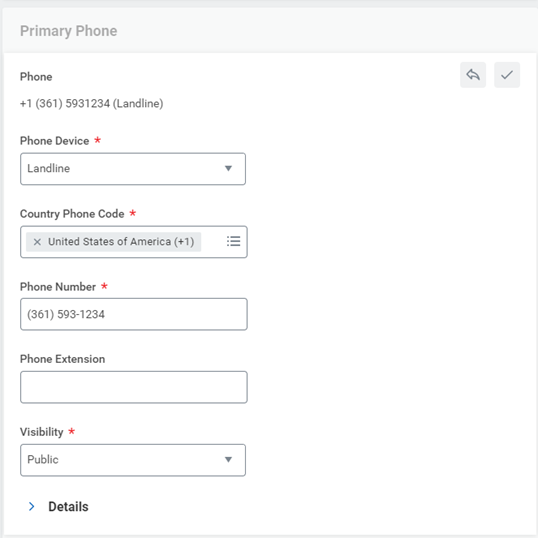
How to Update Your Campus Phone Number:
- Scroll down to the section titled “Primary Phone” and click on the pencil icon.
- In the “Phone Device” field, select the “Landline” option.
- In the “Country Phone Code” field, select “United States of America (+1).”
- In the “Phone Number” field, type in the area code and your campus phone number.
- In the “Visibility” field, select the “Public” option.
(See a screenshot of these fields below)
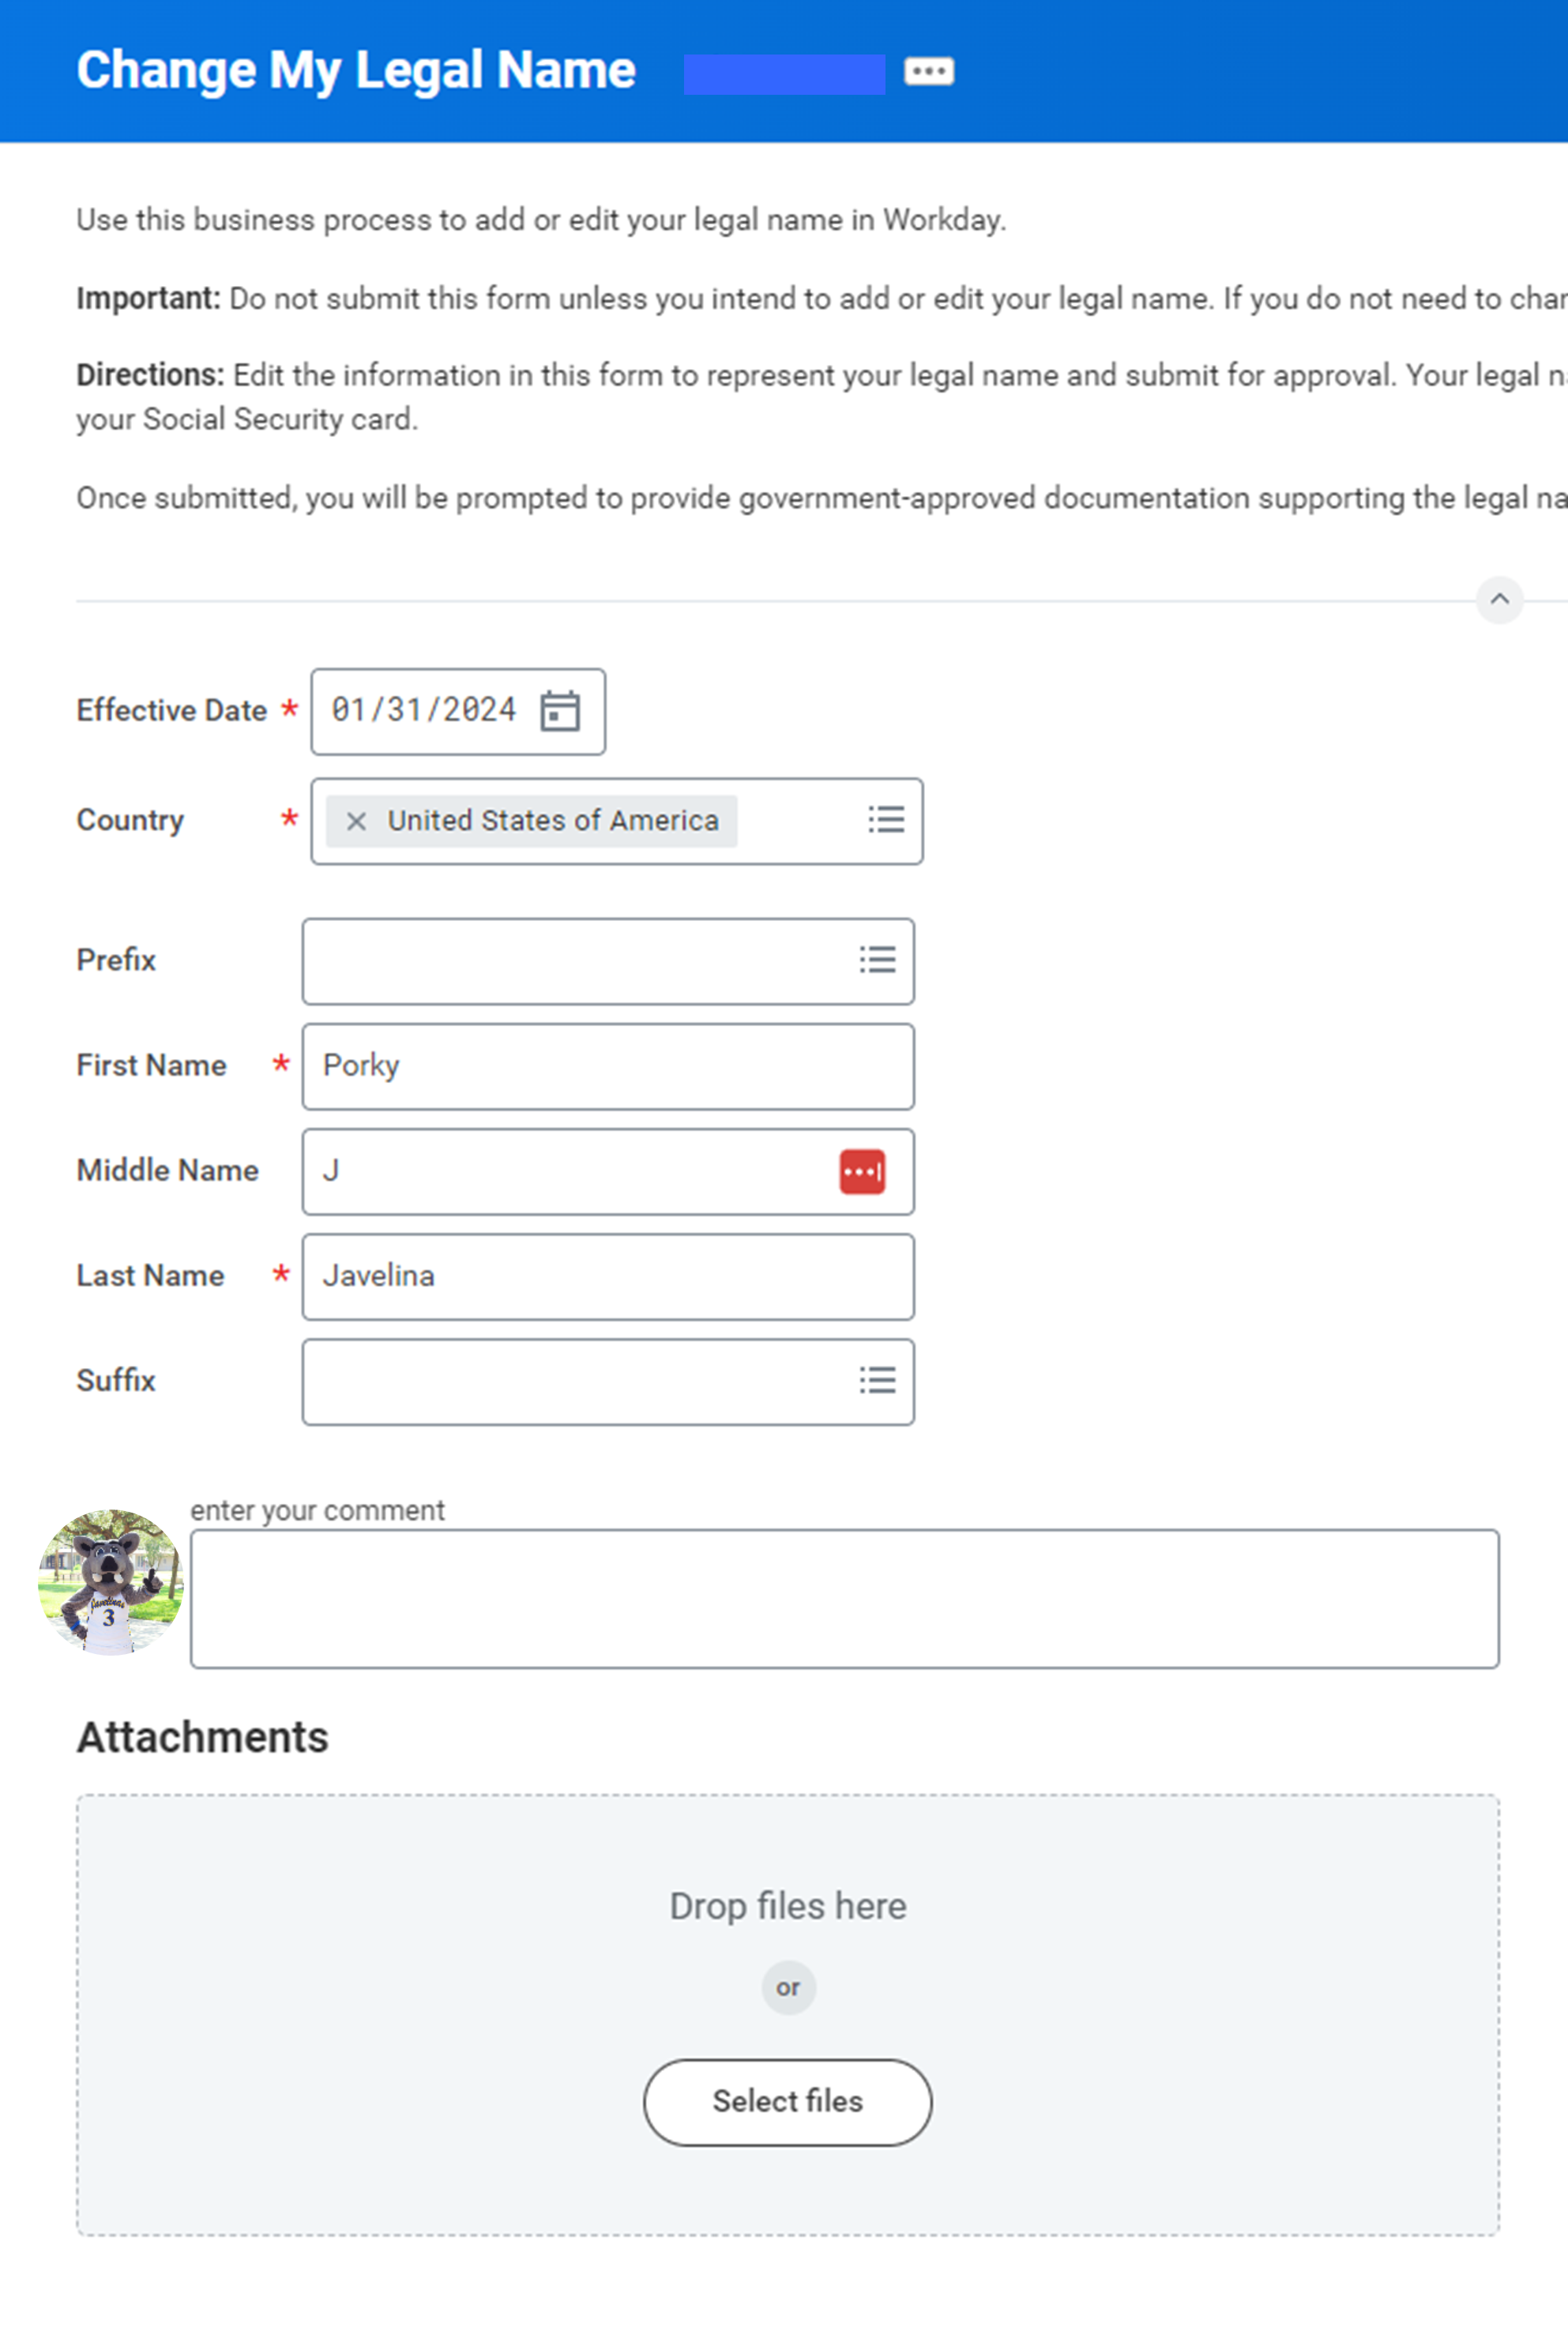
How to Update/Change Your Name in the Campus Directory:
- Log into Workday.
- Click on the “Personal Information” worklet, (located on the homepage or by clicking “MENU”).
- Click on “Legal Name” button in the Change
- In the “Effective Date” field, enter the date your name change will take effect.
- In the “Country” field, enter “United States of America.”
- In the “Prefix” field, select a prefix if one is preferred (not required).
- In the “First Name” field, enter your legal first name(s).
- In the “Middle Name” field, enter your legal middle name(s), (not required).
- In the “Last Name” field, enter your legal last name(s) or surname(s).
- Attach a copy of your Social Security Card and/or other government-approved documentation supporting the legal name change, then click the “Submit” button.**
- If your university email address needs to be changed as well, you may submit a ticket to the ITS Help Desk by calling (361) 593-HELP (4357). Please note that his step should only be done after changes in Workday have been approved.
(See a screenshot of these fields below)
**After a name change request is submitted in Workday, employees are still required to take the original government-approved documents in-person to the Human Resources Office located in College Hall, Room 250. If you have questions regarding these documents, please call Human Resources at 361-593-3705.